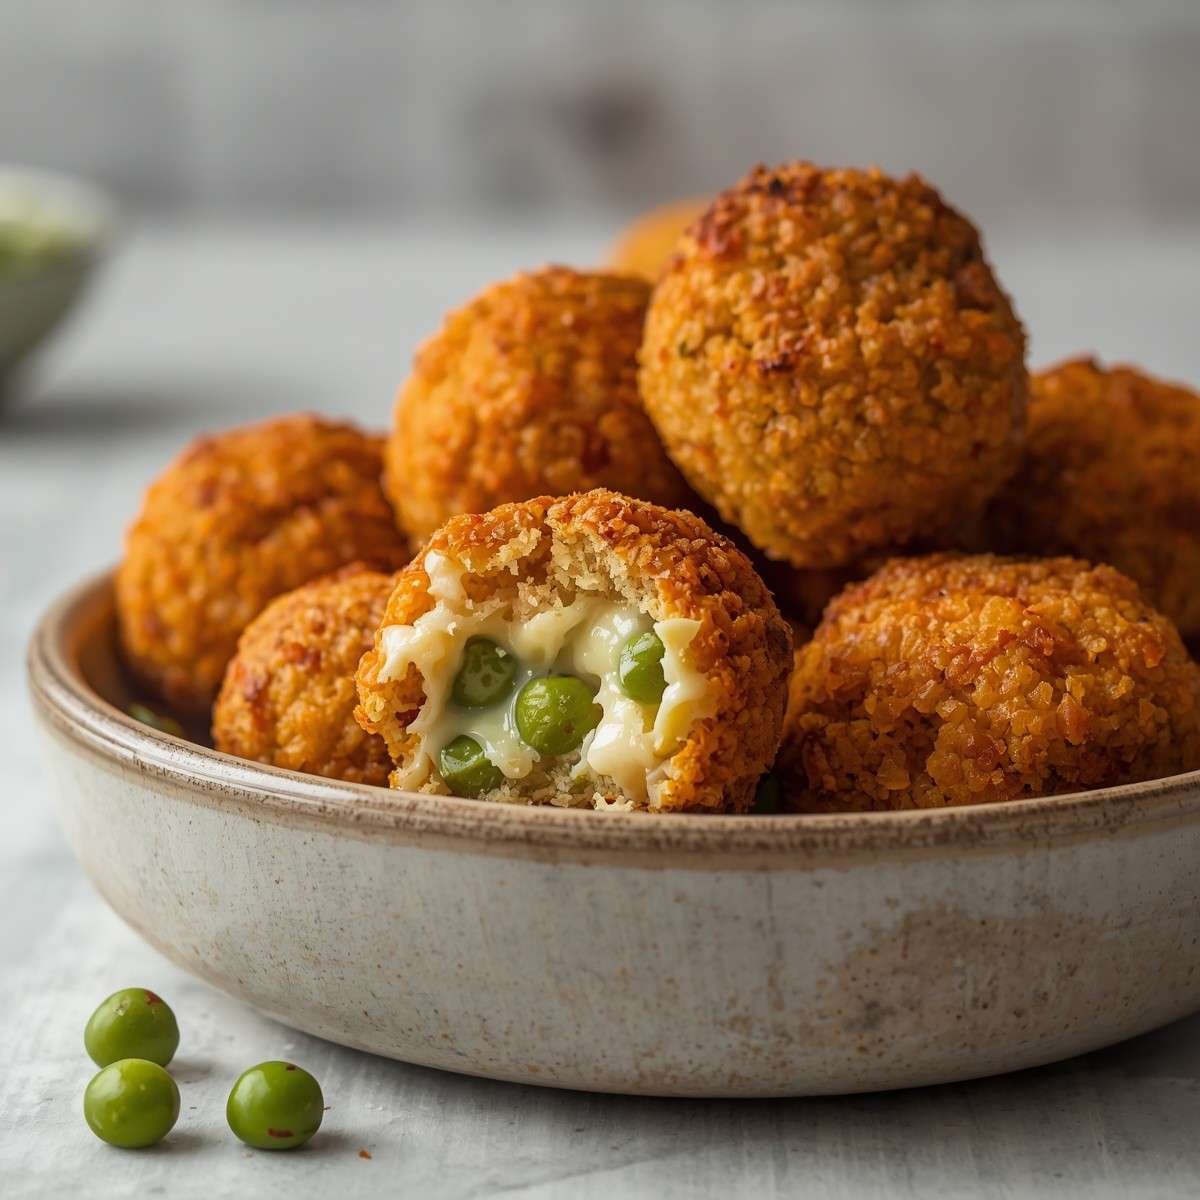
If you’re looking for a crispy, cheesy snack that’s both comforting and packed with flavor, these Cheesy Pea Balls are a must-try. With a golden crunchy coating on the outside and a soft, cheesy, herb-filled center, every bite delivers the perfect balance of texture and taste. They’re ideal as a party appetizer, tea-time snack, or even a fun side dish for gatherings.
What makes this recipe special is how simple ingredients like green peas and cheese come together to create something incredibly satisfying. The natural sweetness of peas blends beautifully with melted cheese, while herbs and spices elevate the flavor. Plus, these bite-sized delights are easy to prepare and can be made ahead of time, making them perfect for busy days or entertaining guests.
Ingredients
- 2 cups green peas (fresh or frozen, boiled and drained)
- 1 cup mozzarella cheese (cut into small cubes)
- 1/2 cup breadcrumbs (for coating)
- 1/4 cup breadcrumbs (for mixture)
- 2 tablespoons all-purpose flour
- 2 tablespoons cornstarch
- 2 tablespoons fresh coriander (finely chopped)
- 1 teaspoon garlic paste
- 1/2 teaspoon black pepper
- 1/2 teaspoon red chili flakes
- 1/2 teaspoon salt (adjust to taste)
- 1/2 teaspoon cumin powder
- 1/2 teaspoon garam masala
- 2 tablespoons grated parmesan cheese (optional)
- 1 egg (beaten) or 3 tablespoons milk (for coating)
- Oil for deep frying
Equipments
- Mixing bowl
- Potato masher or food processor
- Frying pan or deep fryer
- Slotted spoon
- Plate for coating
- Paper towels
- Measuring cups and spoons
Instructions
- Boil the green peas in lightly salted water for about 5–7 minutes until soft but not mushy
- Drain the peas completely and let them cool to room temperature
- Transfer the peas to a mixing bowl and mash them using a potato masher until mostly smooth with slight texture
- Add garlic paste, chopped coriander, black pepper, chili flakes, salt, cumin powder, and garam masala to the mashed peas
- Mix everything thoroughly so the spices are evenly distributed
- Add 1/4 cup breadcrumbs and all-purpose flour into the mixture to help bind it together
- If the mixture feels too soft, add a little more breadcrumbs until it becomes easy to shape
- Take a small portion of the mixture and flatten it slightly in your hand
- Place a cube of mozzarella cheese in the center
- Carefully wrap the mixture around the cheese and roll it into a smooth ball
- Repeat the process to form all the balls and place them on a plate
- In a separate bowl, prepare the coating by placing breadcrumbs
- Dip each ball into beaten egg (or milk for eggless option)
- Roll the coated ball in breadcrumbs until fully covered
- For extra crispiness, repeat the dipping and coating process once more
- Heat oil in a deep pan over medium heat until hot but not smoking
- Carefully drop a few balls into the hot oil without overcrowding
- Fry them until golden brown and crispy on all sides
- Remove using a slotted spoon and place on paper towels to absorb excess oil
- Let them cool slightly before serving so the cheese inside sets perfectly
Recipe Information
- Prep Time: 20 minutes
- Cook Time: 15 minutes
- Total Time: 35 minutes
- Servings: 4–5
- Cuisine: Fusion / Italian-Inspired
- Course: Appetizer / Snack
Nutrition Information (Approximate)
- Calories: 220 kcal
- Protein: 8 g
- Carbohydrates: 20 g
- Fat: 12 g
- Fiber: 4 g
- Sugar: 3 g
- Sodium: 320 mg
Flavor Profile Breakdown
- Creamy and cheesy center
- Light sweetness from green peas
- Crispy, golden exterior
- Mild spice with aromatic herbs
- Savory and satisfying bite
Tips for Best Results
- Always drain peas completely to avoid a soggy mixture
- Use chilled cheese cubes to prevent early melting while shaping
- Double coat for extra crunch
- Maintain medium oil temperature for even frying
- Test one ball first to check seasoning and texture
Variations & Substitutions
- Use cheddar or processed cheese instead of mozzarella
- Add mashed potatoes for a softer texture
- Make it vegan using plant-based cheese and skip egg
- Bake or air fry for a healthier version
- Add finely chopped onions or capsicum for extra flavor
Mistakes to Avoid
- Over-mashing peas into a paste
- Using wet mixture that won’t hold shape
- Frying in oil that is too hot or too cold
- Skipping the coating step
- Overcrowding the pan while frying
Serving Suggestions
- Serve with mint chutney or garlic mayo
- Pair with ketchup or spicy dip
- Add to a snack platter with fries and nuggets
- Serve alongside tea or cold beverages
Storage Tips
- Store uncooked balls in fridge for up to 24 hours
- Freeze for up to 1 month before frying
- Reheat fried balls in oven or air fryer for crispiness
- Avoid microwaving as it softens the coating
Why You’ll Love This Recipe
- Easy to make with simple ingredients
- Perfect for parties and gatherings
- Crispy outside, cheesy inside
- Customizable with different flavors
- Kid-friendly and crowd-pleasing
How to Serve
- Serve hot for the best cheesy texture
- Garnish with fresh herbs
- Arrange on a platter with dipping sauces
- Pair with refreshing drinks or tea
FAQs
Can I bake these instead of frying?
Yes, bake at 200°C (400°F) for about 18–20 minutes, flipping halfway for even crispiness.
Can I use frozen peas directly?
Yes, just boil and drain them properly before using.
How do I prevent cheese from leaking?
Seal the balls tightly and ensure the coating is even and firm.
Can I make them ahead of time?
Yes, shape and refrigerate them before frying when needed.
What type of cheese works best?
Mozzarella works best for a stretchy center, but cheddar also works well.
Can I air fry these?
Yes, air fry at 180°C for 12–15 minutes until golden.
Are these gluten-free?
Use gluten-free breadcrumbs and flour to make them gluten-free.
Can I skip breadcrumbs?
Breadcrumbs are essential for crispiness, but crushed cornflakes can be used instead.
How do I make them spicier?
Add green chilies or increase chili flakes in the mixture.
Can I freeze after frying?
It’s better to freeze before frying for best texture after reheating.