
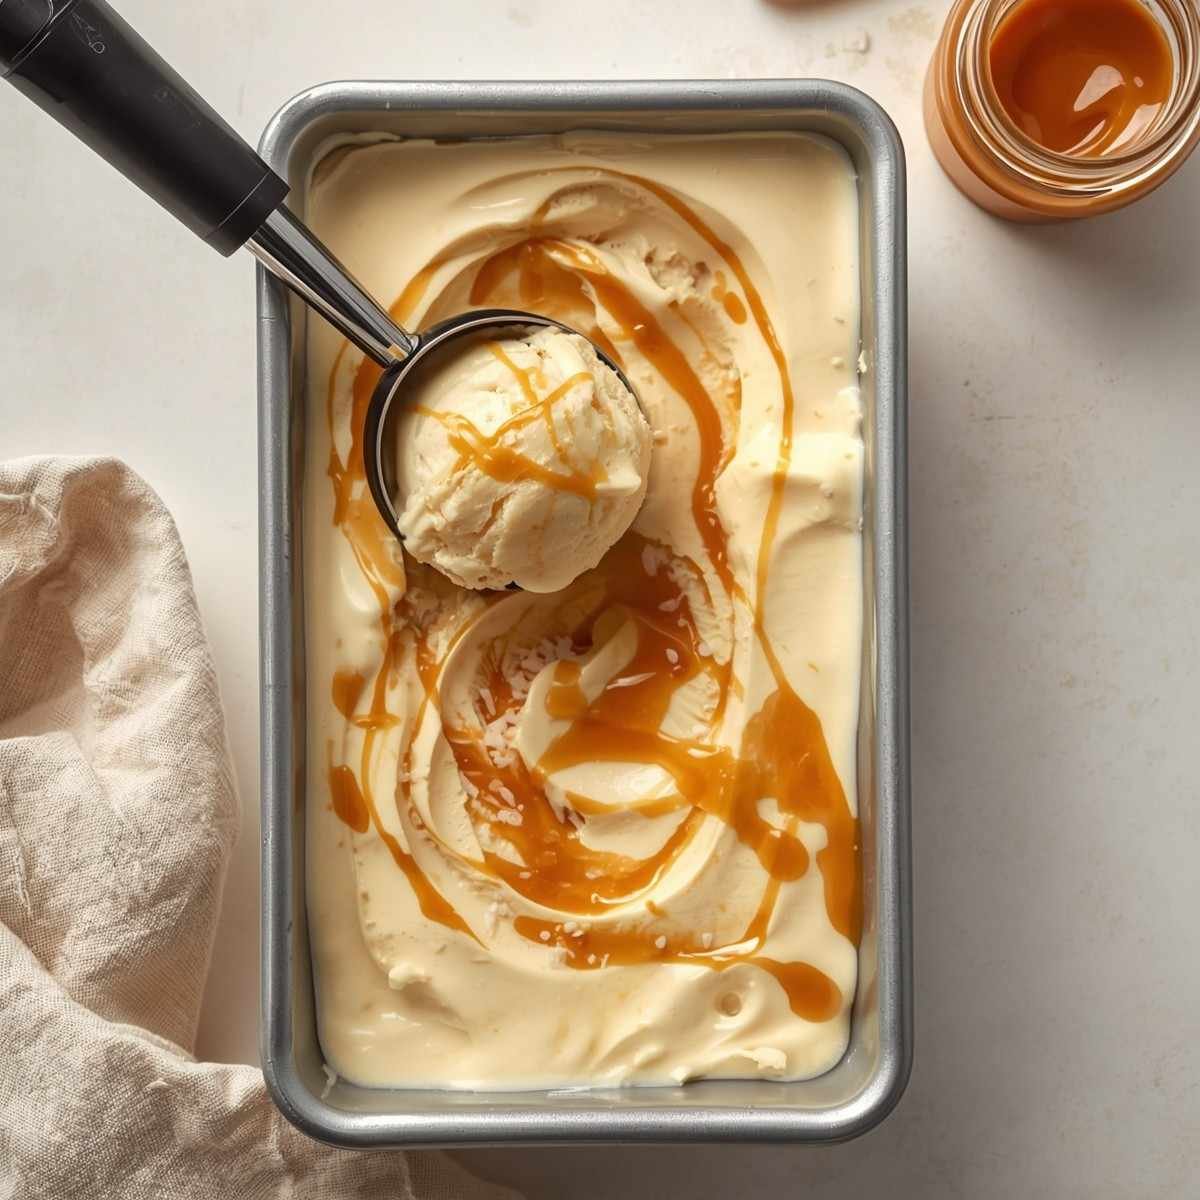
This homemade caramel swirl ice cream is rich, creamy, and filled with luxurious ribbons of buttery caramel in every scoop. Made with a silky vanilla custard base and generous swirls of smooth caramel sauce, this frozen dessert delivers the perfect balance of creamy sweetness and deep caramel flavor. Every bite melts beautifully with velvety texture and rich caramel ribbons throughout the ice cream.
Unlike store-bought caramel ice cream, this homemade version allows you to control the richness, sweetness, and amount of caramel swirl in every layer. The creamy custard base creates a soft and smooth consistency while the caramel adds buttery sweetness with slightly toasted sugar notes. Whether served in cones, bowls, or drizzled with extra caramel sauce, this homemade caramel swirl ice cream is a timeless dessert perfect for summer parties, family gatherings, or anytime you want a rich frozen treat. Caramel swirl ice cream is known for combining creamy vanilla ice cream with ribbons of caramel sauce for added texture and flavor contrast.
Ingredients
- 2 cups heavy cream
- 1 1/2 cups whole milk
- 3/4 cup granulated sugar
- 4 large egg yolks
- 2 teaspoons pure vanilla extract
- 1 pinch salt
- 1 tablespoon honey or corn syrup for softer texture
For the Caramel Swirl
- 1 cup granulated sugar
- 6 tablespoons unsalted butter
- 1/2 cup heavy cream
- 1 teaspoon vanilla extract
- 1/2 teaspoon sea salt
Equipments
- Ice cream maker
- Medium saucepan
- Small saucepan
- Mixing bowls
- Whisk
- Silicone spatula
- Fine mesh strainer
- Measuring cups and spoons
- Electric mixer
- Freezer-safe container
Instructions
- Begin by preparing the caramel swirl sauce first.
- Add 1 cup of granulated sugar to a small saucepan over medium heat.
- Stir continuously as the sugar starts melting.
- Continue cooking until the sugar fully melts into a smooth amber-colored caramel.
- Carefully add the butter while stirring constantly.
- The caramel may bubble rapidly, so stir carefully.
- Slowly pour in the heavy cream while whisking continuously.
- Continue whisking until the caramel becomes smooth and glossy.
- Stir in the vanilla extract and sea salt.
- Remove the caramel sauce from the heat.
- Allow the caramel swirl sauce to cool completely before using.
- In a medium saucepan, combine the whole milk, heavy cream, half of the sugar, and salt.
- Place the saucepan over medium-low heat.
- Stir continuously until the sugar completely dissolves.
- Heat the mixture until lightly steamy but do not boil.
- In a separate mixing bowl, whisk the egg yolks with the remaining sugar.
- Continue whisking until the mixture becomes pale and creamy.
- Slowly pour about 1 cup of the warm cream mixture into the egg yolks while whisking constantly.
- Continue whisking carefully to avoid scrambling the eggs.
- Gradually pour the tempered egg mixture back into the saucepan.
- Return the saucepan to low heat.
- Stir continuously using a silicone spatula while the custard cooks.
- Continue cooking until the custard thickens slightly and coats the back of a spoon.
- Remove the saucepan from the heat immediately once thickened.
- Stir in the vanilla extract and honey if using.
- Pour the custard through a fine mesh strainer into a clean mixing bowl.
- Allow the mixture to cool slightly.
- Cover tightly with plastic wrap.
- Refrigerate the custard base for at least 4 to 6 hours or until completely chilled.
- Freeze your ice cream maker bowl according to manufacturer instructions if required.
- Pour the chilled custard mixture into the ice cream maker.
- Churn according to your machine instructions for approximately 25 to 30 minutes.
- The ice cream should become thick, creamy, and soft-serve in texture.
- Transfer one-third of the churned ice cream into a freezer-safe container.
- Drizzle several spoonfuls of caramel sauce over the layer.
- Repeat layering the ice cream and caramel sauce until all the mixture is used.
- Use a knife or spatula to gently swirl the caramel into the ice cream.
- Do not overmix or the caramel ribbons will disappear.
- Smooth the top evenly.
- Cover tightly with a lid or plastic wrap.
- Freeze for an additional 3 to 4 hours until firm.
- Allow the ice cream to soften slightly before scooping.
- Serve cold with extra caramel drizzle if desired.
Recipe Information
- Prep Time: 35 minutes
- Cook Time: 25 minutes
- Chill Time: 4 hours
- Total Time: 5 hours
- Servings: 8
- Cuisine: American
- Course: Dessert
Nutrition Information (Approximate)
- Calories: 375 kcal
- Protein: 4 g
- Carbohydrates: 35 g
- Fat: 25 g
- Fiber: 0 g
- Sugar: 32 g
- Sodium: 135 mg
Flavor Profile Breakdown
- Rich buttery caramel flavor
- Smooth creamy vanilla custard
- Sweet and slightly salty finish
- Velvety melt-in-your-mouth texture
- Deep caramelized sugar notes
Tips for Best Results
- Use full-fat dairy for the creamiest texture
- Chill the custard completely before churning
- Freeze the ice cream maker bowl overnight
- Let the caramel cool before swirling
- Swirl gently to create visible caramel ribbons
- Use high-quality vanilla extract for better flavor
Variations & Substitutions
- Add crushed cookies for extra texture
- Use salted caramel sauce for deeper flavor
- Mix in toasted pecans or almonds
- Add chocolate chips or fudge swirl
- Replace vanilla with maple extract
- Use coconut cream for dairy-free ice cream
Mistakes to Avoid
- Do not burn the caramel sauce
- Avoid boiling the custard mixture
- Never skip chilling the ice cream base
- Do not overmix the caramel swirl
- Avoid over-churning the ice cream
- Do not store uncovered in the freezer
Serving Suggestions
- Serve in waffle cones
- Top with extra caramel drizzle
- Pair with brownies or cookies
- Add whipped cream topping
- Garnish with sea salt flakes
- Serve alongside apple pie
Storage Tips
- Store in an airtight freezer-safe container
- Keep frozen for up to 2 weeks
- Press plastic wrap onto the surface
- Allow to soften slightly before scooping
- Keep away from freezer door temperature changes
Why You’ll Love This Recipe
- Rich buttery caramel flavor
- Ultra-creamy homemade texture
- Beautiful caramel ribbons throughout
- Better than store-bought ice cream
- Easy to customize with mix-ins
- Perfect sweet and salty balance
- Great for family gatherings
- Elegant homemade dessert
How to Serve
- Scoop into chilled dessert bowls
- Serve in crispy waffle cones
- Pair with cakes and brownies
- Add caramel and nut toppings
- Serve during parties and celebrations
- Enjoy as a luxurious frozen dessert
FAQs
Can I use store-bought caramel sauce for this recipe?
Yes, store-bought caramel sauce works well, but homemade caramel provides richer flavor.
Why did my caramel harden?
Caramel can harden if cooked too long or cooled too quickly.
Do I need an ice cream maker for this recipe?
An ice cream maker creates the smoothest texture, but manual freezing with stirring also works.
Can I make salted caramel swirl ice cream?
Yes, simply add extra sea salt to the caramel sauce.
Why is my homemade ice cream icy?
Ice crystals form when the mixture is not chilled properly before churning.
How long does homemade caramel swirl ice cream last?
It stays fresh for about 2 weeks when stored properly in an airtight container.
Can I add mix-ins to this recipe?
Yes, nuts, cookies, chocolate chips, and brownie chunks pair perfectly with caramel ice cream.
Can I make this recipe without eggs?
Yes, you can make a Philadelphia-style version without egg yolks.
How do I keep caramel swirls visible?
Layer the caramel gently and swirl lightly without overmixing.
How do I keep homemade ice cream creamy?
Use full-fat dairy, chill the mixture thoroughly, and store it in an airtight container.

